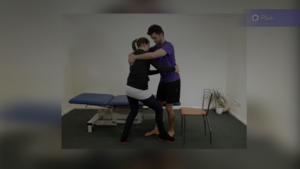
Transfers
Original Editors - Naomi O'Reilly and Robin Tacchetti
Top Contributors - Naomi O'Reilly and Jess Bell
Introduction[edit | edit source]
A transfer can be viewed as the safe movement of a person from one place or surface to another[1] and an opportunity to train an individual to enhance independent function.[2] Patient transfers require varying levels of assistance, including manual assistance and/or the use of assistive devices, such as a hoist.[3] Transfers can be vertical (i.e. from a seated-to-seated position (wheelchair to toilet) or supine-to-seated position (bed to wheelchair)) and horizontal or lateral (i.e. from one flat surface to another (bed to stretcher)).[4]
Benefits of Movement and Mobilisation[edit | edit source]
Evidence supports the positive effect of movement and mobilisation on:
- the quality and speed of a patient's recovery
- the patient's ability to maintain their current level of physical ability
Early mobilisation is crucial for positive patient outcomes, such as decreased incidence of pneumonia, falls, skin tears, and length of stay in Intensive Care Units and acute care settings and increased quality of life[5]
Conversely, insufficient movement increases an individual's risk for immobility-related adverse events, such as pressure injuries, reduced range of motion, muscle strength and mobility and muscle atrophy.[6] [7][8]
Risks[edit | edit source]
Research shows that injuries to health and social care workers happen most frequently during patient transfers, with up to one-third of workplace injuries to staff in hospitals and nursing homes occurring when moving patients.[9] [10] Transfers can also increase the risk to patients for injury, pain, and negative health outcomes. It has also been found that manual handling combined with the infrequent use of assistive technology may reduce opportunities for patients to move, mobilise, and engage in weight-bearing activities. This lack of opportunities can have an impact on recovery, rehabilitation, and general health.[4]
To achieve a successful and safe patient transfer, health workers need to understand their patient's specific needs, follow evidence-based guidelines and conduct a thorough assessment.[11] Health workers must choose the most efficient transfer method while considering patient and clinician safety.
Indications[edit | edit source]
Indications for transferring a patient vary depending on the patient population. However, transfers are typically indicated for patients who have difficulty moving independently and require assistance with moving independently from one position to another safely.[2] [4] Patients should always be encouraged to move independently. But when assistance is required, they should still be encouraged to do as much as they can.
The following are just some of the indications for patient transfers:
- safety
- comfort
- support patient care tasks
- support patient procedures
- prevent secondary complications of immobilisation
- support activities of daily living
- support rehabilitation
Contraindication and Precautions[edit | edit source]
There are no general contraindications for transfers. Transfers may be contraindicated for specific conditions or following particular procedures. However, it is more common that specific precautions will be put in place to maintain safety during transfers. The following precautions should be considered in the conditions listed below:
- Hip Arthroplasty. Associated movement precautions based on the method of surgical replacement. Traditionally, these precautions stay in place for 6 weeks following the joint replacement. However, it is noteworthy that current evidence does not routinely support the use of these hip precautions in patients post-total hip arthroplasty for primary hip osteoarthritis to prevent dislocation.[12]
- Anterior Approach - Avoid hip external rotation, active abduction and flexion beyond 90°
- Posterior Approach - Avoid hip internal rotation, adduction across the midline, and flexion beyond 90°
- Lateral Approach - Avoid hip external rotation, active abduction, and extension
- Post-Spinal Surgery. Spinal precautions are guidelines or restrictions put in place to protect the spine and reduce the risk of further injury after spinal surgery, spinal trauma, or suspected spinal instability.
- Restrictions in forward flexion following spinal surgery limit the patient's ability to assume certain positions comfortably and may require modifications to their transfers to avoid excessive bending, twisting, rotation or flexion of the spine. Clear communication and understanding of the specific precautions and their impact on positioning are vital to ensure patient safety and optimal outcomes.
- Spinal Cord Injury. Spinal cord injury rehabilitation occurs in different stages and may take weeks, months, or even years. Transfers play a vital role throughout each stage, with up to six members of staff required to work together to carry out routine transfers. A nominated team leader should coordinate all moving and handling during the acute phase.[13] Supported and independent transfer techniques should be taught at specialist spinal cord injury rehabilitation settings.[13] Read more about Transfers for Spinal Cord Injury.
- Pre-Hospital and Acute Management - Carry out or maintain full in‑line spinal immobilisation if there is a high risk of spinal cord injury.[14] During any logroll manoeuvres or when transferring a patient from one surface to another, the patient’s head and vertebral column must be kept in alignment.[13]
- Bracing - Be aware of requirements for any bracing or orthotic use required during transfers and ensure they are properly fit to the patient before completing any transfers.
- Osteoporosis. Defined as low bone mineral density caused by altered bone microstructure, which predisposes patients to low-impact, fragility fractures. Fragility fractures result from mechanical forces that would not ordinarily cause a fracture. They occur during normal daily activities such as bending, twisting, walking or lifting relatively light objects. There is also an increased risk of spontaneous fractures with weight bearing following periods of prolonged bed rest or immobility.[15]
- Stroke or Acquired Brain Injury. Glenohumeral subluxation is a common complication of stroke and acquired brain injury in patients with hemiplegia, and it is an important risk factor for shoulder pain and other problems. Factors that contribute to glenohumeral subluxation include improper positioning, lack of support in the upright position, and pulling on the hemiplegic arm during transfers.
- It is important to protect and support the arm during transfers or functional mobility; avoid pulling on the affected arm.[18]
- Weight-bearing Status. Weight bearing refers to how much weight or force is put through a specific limb. It is common for a reduced amount of weight bearing to be prescribed following a specific surgery or injury. Adherence to a reduced weight-bearing status is vital for optimal recovery, as prematurely increased weight bearing can delay healing.[19][20]
- Reduced weight-bearing status can be applied to either an upper or lower limb.
- Weight-bearing status can significantly impact the type of transfers available to the patient and the level of support required.
- Patients who are non-weight bearing or restricted from bearing weight on a specific limb may require additional support, stabilisation or assistive devices during transfers.
Principles of Transfers[edit | edit source]
The following principles should always be considered in relation to a patient's short‐ and long‐term goals and management approach. Each patient has unique needs and preferences, so before transferring a patient, it is important to assess the situation and environment. Clinicians must also conduct an individualised assessment which considers the patient's medical condition, mobility limitations, and comfort preferences. This helps to ensure that dignified and respectful positioning care is provided.
Please consider the following principles when deciding how much assistance the patient requires, how much they can do themselves, and what method of transfer should be used.
- Preparation for Transfers
- Check for precautions
- Complete your assessment before moving and handling
- Confirm weight-bearing status
- Determine the level of assistance required
- Determine assistive devices required
- Encourage Patient Participation
- The amount of assistance each patient requires depends on the patient’s previous health status, age, type of illness, and length of stay[1]
- Engaging patients in the transfer process by seeking their input and involving them in decision-making empowers them and promotes respect - encourage the patient to perform as much of the transfer as possible
- Support the patient's natural movement patterns
- Ergonomics. The science of fitting the physical demands of the transfer to the therapist to prevent injury and improve therapist and patient comfort during the transfer process.
- Distance between surfaces
- Aim for the distance to be as short as possible between surfaces
- Height of transfer surfaces
- Allow for ergonomic work postures based on the shortest person assisting
- Distance between surfaces
- Body Mechanics. The coordinated effort of muscles, bones, and the nervous system to maintain balance, posture, and alignment while positioning, transferring, and mobilising patients. Proper body mechanics allows individuals to carry out activities without excessive use of energy, and it helps prevent injuries for patients and health care providers.[21] Always consider the principles of proper body mechanics prior to any transfer - assess the environment, plan the transfer, avoid stretching and twisting, ensure a wide stance, stand as close to the patient as possible, face the direction of movement.
- Upper limbs:
- shoulders relaxed and low
- elbows close to the body
- wrists neutral
- do not squeeze firmly with the fingers
- Spine
- the spine is subjected to the most strain during patient transfers
- maintain a neutral spine
- minimise rotation or twisting of the spine
- Lower limbs
- make sure knees and feet are aligned
- adopt a wide stance - shoulder width apart
- bend knees with lifting
- Upper limbs:
- Communication. Clear and compassionate communication enhances a patient's understanding and cooperation during transfers. Patients should be informed about transfers and their role and encouraged to independently perform as many steps as possible.
- Use of Cues
- Sensory cues, including auditory, tactile and visual cues, are commonly used in rehabilitation settings and have been shown to be beneficial in motor learning and motor performance. They are known to improve movement and mobility in many conditions including stroke, spinal cord injury, Parkinsons's and dementia.[22][23][24]
- Cues are used to enhance communication by directly prompting a person to take action or respond or indirectly inferring that a response is wanted. Commonly, clinicians use a range of cues to support transfers, which often increase patient engagement in the process.[25]
- Commands and Counts
- Commands and counts should be synchronised with all participants
- The rehabilitation professional at the head of the patient should give the commands when more than one person is assisting with the transfer
- Use of Cues
Levels of Assistance[edit | edit source]
The level of assistance a patient requires during transfers depends on their size and physical, cognitive and medical capabilities. Therapists determine the level of assistance by subjectively grading the amount of assistance required by a patient during specific patient-handling tasks. This assessment should be based on the assistance level required by the patient and not the perceived effort level by the therapists during patient assistance. This encourages continuity of care - if another therapist is transferring the patient, they will have an idea of the amount of assistance required. It can also be used to track the patient's progress.[26] The various levels of assistance are described below:
- Independant
- patient is able to transfer independently and safely
- no assistance is required
- Supervision
- patient may require assistance with set up for the transfer
- requires no physical assistance during the transfer
- may require supervision
- Stand By Assistance
- patient requires no physical assistance
- may require verbal cues
- Contact Guard Assistance
- patient is cooperative and reliable
- occasional loss of balance
- requires therapist to maintain contact with patient
- Minimal Assistance
- patient is cooperative and reliable
- needs minimal physical assistance with the transfer
- requires minor physical exertion from health and social care worker during transfers
- is able to perform 75% of the required activity on their own
- clinician provides 25% assistance
- typically requires only one person to assist with the transfer
- Moderate Assistance
- patient requires more than minor physical assistance
- often needs equipment to assist with transfers
- is able to perform 50% of the required activity on their own
- clinician provides 50% assistance
- may require two persons to assist with the transfer
- Maximum Assistance
- patient requires full physical assistance for all transfers
- may be unpredictable and uncooperative
- requires equipment to assist with transfers
- is able to perform 0-25% of the required activity on their own
- clinician provides 75+% assistance
- typically requires two persons to assist with the transfer
- Dependent
- patient is unable to assist and does not actively participate in the transfer
- clinician performs all aspects of the transfer
Assistive Devices for Transfers[edit | edit source]
Assistive devices for transfers are tools or equipment designed to assist individuals in achieving optimal body positioning and support for enhanced comfort, function, and independence. These devices are particularly beneficial for individuals with mobility limitations, physical disabilities, or medical conditions that affect their ability to maintain proper posture and positioning.[27] Assistive devices also allow the healthcare worker to position and transfer patients in a way that reduces the risk of injury for themselves and their patients.
Assistive devices that can be utilised for transfers include slide sheets, transfer belts, sliding boards, turn tables, sit to stand devices and hoists. Read more about the wide range of assistive devices available to support patient transfers here.
Common Transfers[edit | edit source]
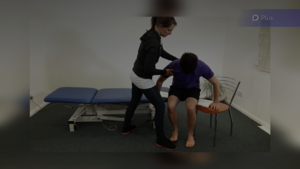
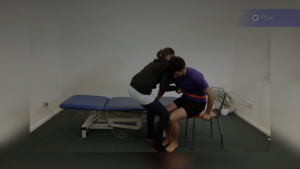
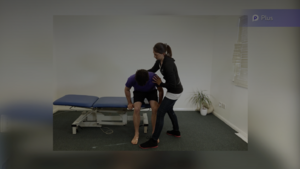
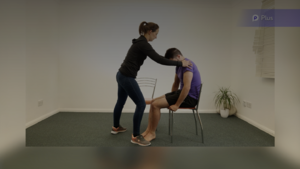
Table 1 provides an overview of common ways to transfer patients.
| Transfer | Purpose and Populations | Description | Assistive Devices |
|---|---|---|---|
| Sliding Board Transfer | Sliding board transfers are typically used for patients who are unable to bear weight on their legs, have paralysis or limb loss in the lower limbs. |
|
|
| Squat Pivot Transfer | The squat pivot transfer is useful for patients who can support some of their weight but are unable to achieve a full stand. |
|
|
| Sit to Stand Transfer | The sit to stand transfer is useful for reliable and predictable patients who can actively participate and have some ability to stand. |
|
|
| Stand Pivot Transfer | The stand pivot transfer is useful for patients who can support most of their weight in standing but cannot move from one place to another. |
|
|
| Stand Step Transfer | The stand step transfer is for patients who can support their weight in standing, but cannot take steps to move from one place to another with support. They may also use an assistive device. |
|
|
Summary[edit | edit source]
- Transferring a patient can be physically demanding, often requiring strenuous movements and awkward positioning. Because of the potential harm posed to both the patient and the rehabilitation professional, transfers are considered a high-risk manoeuvre.
- Attention to proper ergonomics may reduce the risk of musculoskeletal injuries to rehabilitation professionals.
- Using assistive devices, such as sliding sheets, sliding boards, transfer belts, sit to stand devices and multi-person teams, may reduce the burden placed on rehabilitation professionals who routinely perform patient transfers.
- Remember that transfers should always be individualised to a patient’s unique needs and limitations.
- The transfer strategy should be regularly evaluated and reassessed to ensure safety and that the patient's desired rehabilitation goals are being achieved.
References [edit | edit source]
- ↑ 1.0 1.1 Perry, A. G., Potter, P. A., & Ostendorf, W. R. (2014). Clinical nursing skills and techniques. St Louis, MO: Mosby Elsevier.
- ↑ 2.0 2.1 Patient Transfers and Mobility. In: Dutton M. eds. Introduction to Physical Therapy and Patient Skills. McGraw Hill; 2014. Accessed June 24, 2023. https://accessphysiotherapy.mhmedical.com/content.aspx?bookid=1472§ionid=86198760
- ↑ Karhula K, Rönnholm T, Sjögren T. A method for evaluating the load of patient transfers. Occupational Safety and Health Administration. Occupational safety and health publications. 2009;83.
- ↑ 4.0 4.1 4.2 Matz MW. Patient Handling and Mobility Assessments 2nd Edition. The Facility Guidelines Institute 2019. Available from: https://www.fgiguidelines.org/wp-content/uploads/2019/10/FGI-Patient-Handling-and-Mobility-Assessments_191008.pdf [Accessed: 23/06/2023
- ↑ Association of Safe Patient Handling Professionals/American Nurses Association, “Advancing the Science and Technology of Progressive Mobility.”
- ↑ R. L. Kane, J. G. Ouslander, and I. B. Abrass, Essentials of Clinical Geriatrics, 5th ed. (New York: McGraw-Hill, 2004), 245–48;
- ↑ H. L. Wald et al., “The Case for Mobility Assessment in Hospitalized Older Adults, A White Paper from the American Geriatrics Society,” Journal of the American Geriatric Society 67, no. 1 (2019): 11–16.
- ↑ Rosemary A. Timmerman, “A mobility protocol for critically ill adults,” Dimensions of Critical Care Nursing 26, no. 5 (Sept.-Oct. 2007): 175–79.
- ↑ Pompeii LA, Lipscomb HJ, Schoenfisch AL, Dement JM. Musculoskeletal injuries resulting from patient handling tasks among hospital workers. American journal of industrial medicine. 2009 Jul;52(7):571-8.
- ↑ Strid EN, Wåhlin C, Ros A, Kvarnström S. Health care workers’ experiences of workplace incidents that posed a risk of patient and worker injury: a critical incident technique analysis. BMC health services research. 2021 May 27;21(1):511.
- ↑ Bergman R, De Jesus O. Patient Care Transfer Techniques. [Updated 2022 Oct 17]. In: StatPearls [Internet]. Treasure Island (FL): StatPearls Publishing; 2023 Jan-. Available from: https://www.ncbi.nlm.nih.gov/books/NBK564305/
- ↑ Korfitsen CB, Mikkelsen LR, Mikkelsen ML, Rohde JF, Holm PM, Tarp S, et al. Hip precautions after posterior-approach total hip arthroplasty among patients with primary hip osteoarthritis do not influence early recovery: a systematic review and meta-analysis of randomized and non-randomized studies with 8,835 patients. Acta Orthopaedica. 2023 Apr 5;94:141-51.
- ↑ 13.0 13.1 13.2 Multidisciplinary Association of SCI Professionals and the Spinal Injuries Association, Moving and Handling Patients with Actual or Suspected Spinal Cord Injuries (SCI), 2015, Available from: https://www.mascip.co.uk/wp-content/uploads/2015/02/MASCIP-SIA-Guidelines-for-MH-Trainers.pdf, [10 July 2023]
- ↑ National Institute for Health and Care Excellence. Spinal Injury: Assessment and Initial Management (NICE Guideline NG41). National Clinical Guideline Centre, 2016. Available at https://www.nice.org.uk/guidance/ng41 [Accessed 10/11/2018]
- ↑ Smith MC, O'May F, Tropea S, Berg J. Framing moving and handling as a complex healthcare intervention within the acute care of older people with osteoporosis: a qualitative study. Journal of Clinical Nursing. 2016 Oct;25(19-20):2906-20.
- ↑ Smith MC, Pearson C, O'May F, Tropea S, Irvine L, Rush R, Wilson R. Final Report for The Lydia Osteoporosis Project. 2016
- ↑ Royal Osteoporosis Society. Moving and Lifting Safely. Available from: https://theros.org.uk/information-and-support/osteoporosis/living-with-osteoporosis/exercise-and-physical-activity-for-osteoporosis/caring-for-your-back/moving-and-lifting-safely/ (accessed 11 July 2023)
- ↑ Canadian Stroke Best Practices. Rehabilitation and Recovery following Stroke - 5.3. Management of Shoulder Pain & Complex Regional Pain Syndrome (CRPS) following Stroke. 2019. Available from: https://www.strokebestpractices.ca/recommendations/stroke-rehabilitation/management-of-shoulder-pain-complex-regional-pain-syndrome-crps-following-stroke [Accessed on 11 July 2023]
- ↑ Augat P, Merk J, Ignatius A, Margevicius K, Bauer G, Rosenbaum D, Claes L. Early, full weightbearing with flexible fixation delays fracture healing. Clinical Orthopaedics and Related Research®. 1996 Jul 1; 328:194-202.
- ↑ Mavčič B, Antolič V. Optimal mechanical environment of the healing bone fracture/osteotomy. International orthopaedics. 2012 Apr 1;36(4):689-95.
- ↑ Perry, A. G., Potter, P. A., & Ostendorf, W. R. (2018). Clinical nursing skills and techniques (9th ed.). St. Louis, MO: Elsevier-Mosby.
- ↑ Hollands KL, Pelton T, Wimperis A, Whitham D, Jowett S, Sackley C, Alan W, Van Vliet P. Visual cue training to improve walking and turning after stroke: a study protocol for a multi-centre, single blind randomised pilot trial. Trials. 2013 Dec;14(1):1-1.
- ↑ Ghai S, Ghai I, Schmitz G, Effenberg AO. Effect of rhythmic auditory cueing on parkinsonian gait: a systematic review and meta-analysis. Scientific reports. 2018 Jan 11;8(1):1-9.
- ↑ Ghai S, Ghai I, Schmitz G, Effenberg AO. Effect of rhythmic auditory cueing on parkinsonian gait: a systematic review and meta-analysis. Scientific reports. 2018 Jan 11;8(1):1-9.
- ↑ Föcker J, Atkins P, Vantzos FC, Wilhelm M, Schenk T, Meyerhoff HS. Exploring the effectiveness of auditory, visual, and audio-visual sensory cues in a multiple object tracking environment. Attention, Perception, & Psychophysics. 2022 Jul;84(5):1611-24.
- ↑ Reichert P. Patient Handling Ergonomics. Thesis. New Jersey Institute of Technology. 2004
- ↑ WHO. Definition of Assistive Technology. Available from: http://www.who.int/disabilities/technology/en/. (accessed19 April 2023)
