Basic Life Support (BLS)
Original Editor - Safiya Naz
Top Contributors - Safiya Naz, Lucinda hampton and Kim Jackson
Introduction[edit | edit source]
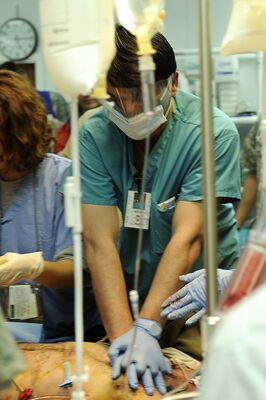
Basic Life Support (BLS) is performed to support the patient’s circulation and respiration through the use of cardiopulmonary resuscitation (CPR) until advanced life support arrives. Victims who have had early and correct BLS intervention will be better oxygenated and are more likely to respond to advanced techniques to revive them, thereby increasing their chance of survival.
BLS is the core of any resuscitation attempt, key elements include:
- Prompt recognition of cardiac arrest
- Call for urgent medical assistance
- Early effective CPR with an emphasis on minimal disruptions to compressions
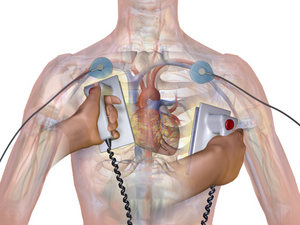
- Early defibrillation
- Early advanced life support
- Integrated post-cardiac arrest care[1]
Cardiopulmonary Resuscitation (CPR)[edit | edit source]
CPR is a lifesaving technique. It aims to keep blood and oxygen flowing through the body when a person’s heart and breathing have stopped[2]. Cardiac arrest occurs in unexpected places other than medical facilities.
CPR is for people experiencing cardiac arrest.
When the heart stops beating, cardiopulmonary resuscitation (CPR) is used to save the patient's life. After a cardiac arrest, immediate CPR can double or triple the possibilities of survival[3]
The steps involved in CPR are known as DRSABCD (or ‘doctors ABCD’)
D – Danger R – Response S – Send for help A – Airway B – Breathing C – CPR D – Defibrillator [4]
Types of CPR[edit | edit source]
Two types of CPR exist and both have a potentially life-saving impact. They are:
- Hands-only CPR. Involves calling for help and then pushing on the chest in a rapid motion ie chest compressions. Hands-only CPR can prevent a delay in getting blood moving through the body.
- Traditional CPR with breaths. Also called CPR with breaths, this alternates chest compressions with mouth-to-mouth breaths. This type of CPR can give the body more oxygen in the critical moments before help arrives.
People who have no CPR training, received training many years ago, or are trained but not confident should use hands-only CPR.
People with training in traditional CPR, and who are comfortable with the method, can use this technique[1].
Compressions only CPR[edit | edit source]
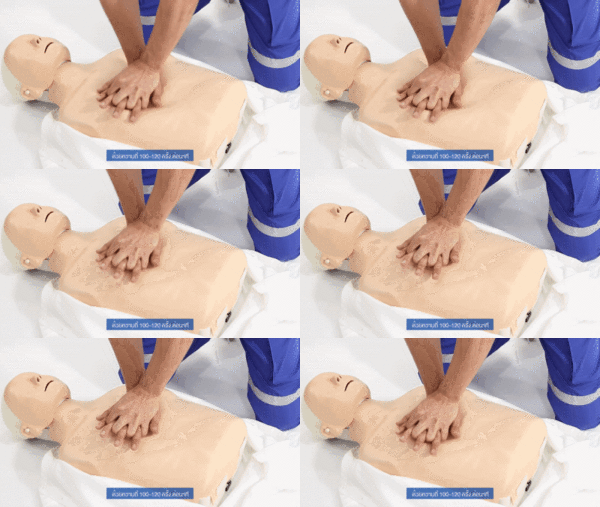
Commenced when a victim/patient is unresponsive and not breathing normally. Early compressions can improve outcomes by keeping the brain and heart perfused with the oxygenated blood in the circulatory system prior to collapse. Rules for achieving effective chest compressions:
- 100 – 120 compressions per minute (for all ages)
- Push down firmly on the sternum to 1/3 of the depth of the chest
- Push in a regular rhythm, for example counting ‘1, 2, 3’
- Compression/relaxation ratio should be 50:50 with complete recoil of chest between each compression
- Frequent rotation of personnel should be taken after approximately 200 compressions or approximately every two (2) minutes
- Avoid compression below lower limits of sternum as may cause regurgitation and/or damage to liver/spleen/stomach
- Interruptions to chest compressions should be minimised
- Avoid compressions applied too high as ineffective depth is achieved
- After each 30 compressions there is an interruption in chest compressions for two (2) rescue breaths (optional).[2]
To keep the correct rhythm of compressions it may help to use these popular songs:
- ‘Staying alive’ by the Bee Gees
- ‘Row, row, row, your boat’
- ‘Baby shark’.[4]
Combine Rescue Breathing With Chest Compressions[edit | edit source]
CPR with breaths: Steps for adults and teens
1. Perform chest compressions.: Checking the scene for safety then place the person on a firm, flat surface, perform 30 chest compressions.
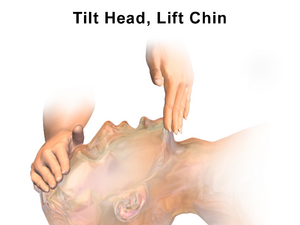
2. Open the airway: Put the palm of your hand on the person’s forehead and tilt your head back. Gently lift their chin forward with your other hand.
3. Give rescue breaths: With the airway open, pinch the nostrils shut, and cover the person’s mouth with a CPR face mask to make a seal. For infants, cover both mouth and nose with the mask. If a mask isn’t available, cover the person’s mouth with yours. Give two rescue breaths, each lasting about 1 second. Watch for their chest to rise with each breath. If it doesn’t, reposition the face mask and try again.
4. Alternate rescue breathing with chest compressions: Continue alternating 30 compressions with two rescue breaths until the person begins to breathe or until medical help arrives. If the person begins to breathe, have him or her lie on their side quietly until medical assistance is on the scene[2].
Viewing[edit | edit source]
This 4 minute video shows how to perform CPR
References[edit | edit source]
- ↑ 1.0 1.1 Health care Australia BLS Available: https://services.healthcareaustralia.com.au/education/eLearning%20BLS%20Tutorial%20Version%209%20-%20Dec%202016-%20ACN%20approved%20feb%202016.pdf(accessed 2.3.2022)
- ↑ 2.0 2.1 2.2 healthline CPR Available:https://www.healthline.com/health/first-aid/cpr (accessed 2.3.2022)
- ↑ Lee K. Cardiopulmonary resuscitation: new concept. Tuberculosis and respiratory diseases. 2012 May 29;72(5):401-8.
- ↑ 4.0 4.1 Better Health CPR Available: https://www.betterhealth.vic.gov.au/health/conditionsandtreatments/cardiopulmonary-resuscitation-cpr(accessed 2.3.2022)
- ↑ https://www.youtube.com/watch?v=hizBdM1Ob68
